PC Quick Start GuideUpdated 4 months ago
Welcome to the Computer Cave Gaming family! We're thrilled for you to unbox your new rig and dive into the world of PC gaming. This guide will walk you through the simple steps of setting up your new computer safely and correctly.
Let's get started!
Step 1: Unboxing Your PC
Your new computer has been carefully packed to protect it during its journey to you.
Open with Care: Place the box upright on the floor and carefully cut the tape to open the top flaps.
Check Your Inventory: Inside the box, you should find the following items:
Your new Computer Cave Gaming PC Tower
A Power Cable
WiFi Antenna(s)
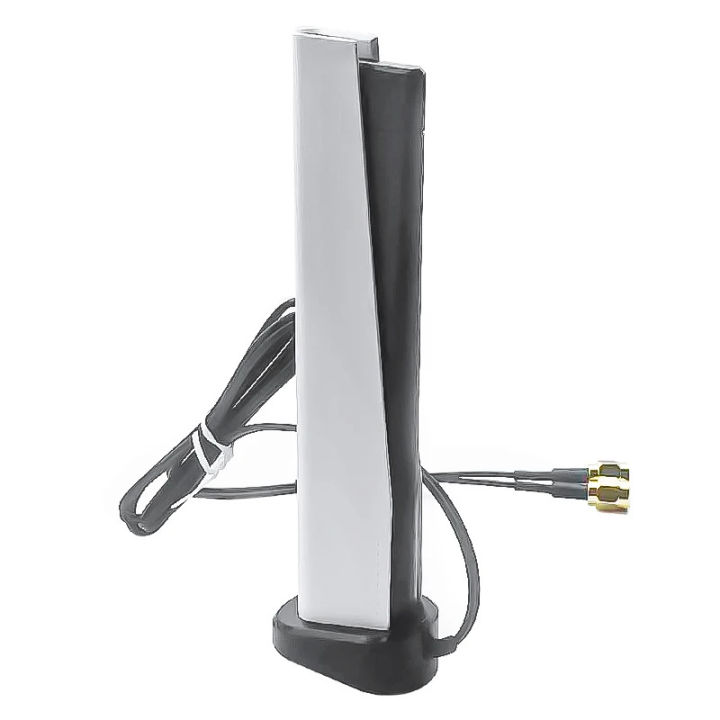 Gigabyte WIFI 6E Antenna
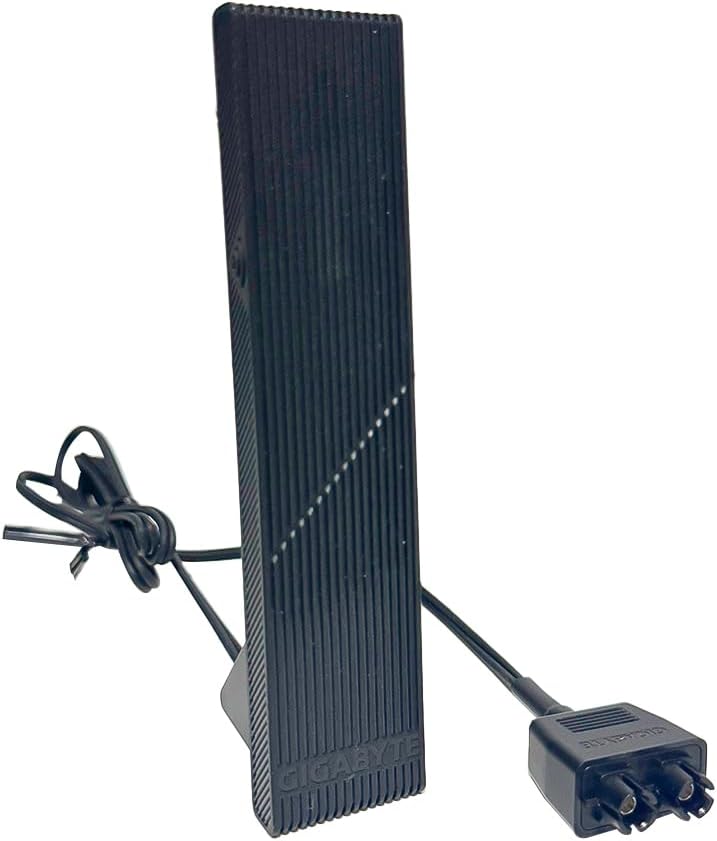 Gigabyte WIFI 7 Antenna
A bag containing extra modular power supply (PSU) and SATA cables for future upgrades.
IMPORTANT - Remove Internal Packing: Before you plug anything in, you must remove the protective foam from inside the PC.
Place the PC on a stable, flat surface.
Unscrew the two thumbscrews on the back of the case that hold the main side panel (usually glass) in place.
Carefully slide the panel off and set it aside safely.
Gently remove the protective packing foam or Instapak bag from inside the main compartment. This is crucial to ensure proper airflow and prevent overheating.
Once the packing is removed, slide the side panel back on and secure it with the thumbscrews.
Step 2: Getting Connected
Now it's time to plug everything in. Follow these steps to connect your peripherals correctly.
Attach Wi-Fi Antennas: Screw the two included Wi-Fi antennas onto the gold-colored posts on the back of your PC. Hand-tight is perfect.
Connect Your Monitor (The Most Important Step!):
Look at the back of your PC. You must plug your monitor's display cable (HDMI or DisplayPort) into the horizontal slots of your graphics card, which is located in the lower half of the case.
Do not plug your monitor into the vertical slots higher up. Those are connected to the motherboard and are disabled on your system. Using the wrong ports is the #1 reason for a "No Signal" error.
Connect Keyboard & Mouse: Plug your keyboard and mouse into any of the available rectangular USB ports on the back or front of the PC.
Connect the Power Cable: Finally, connect the included power cable to the large port at the back of the PC (usually at the bottom) and then plug the other end into a wall outlet or surge protector.
Step 3: Powering On for the First Time
The moment of truth!
Flick the master power switch on the back of the PC to the 'I' (On) position.
Press the main Power Button on the front or top of the case.
You should see the internal RGB lights and fans turn on, and after a few moments, the Windows setup screen will appear on your monitor.
Step 4: Setting Up Windows
Your PC comes with Windows pre-installed and activated. The on-screen setup will guide you the rest of the way.
Follow the prompts from the Windows assistant to connect to your Wi-Fi network, set your language and region, and sign in with your Microsoft account.
Step 5: Post-Setup Essentials
You're almost there! Once you've reached the Windows desktop, we recommend two final steps for the best experience.
Run Windows Update: It's always a good idea to check for the latest Windows updates. Go to Start > Settings > Update & Security > Windows Update and click "Check for updates."
Update Your Graphics Drivers: For the best gaming performance, ensure your graphics drivers are up to date. We have a simple guide that walks you through it here: How to update your Graphics Card GPU driver.
Step 6: You're Ready to Game!
That's it! Your PC is all set up. Now it's time to install your favorite game launchers like Steam, the Epic Games Store, or the Xbox app and start downloading your library.
If you run into any issues, don't hesitate to check out our other knowledge base articles or contact our support team. Welcome to the Cave!